Please register to participate in our discussions with 2 million other members - it's free and quick! Some forums can only be seen by registered members. After you create your account, you'll be able to customize options and access all our 15,000 new posts/day with fewer ads.
Most of my digital photos receive some sort of post processing, some more than others. I seem to be incapable of holding a camera level, so I have to straighten nearly all of them. And I have my camera set up to do minimal processing in-camera, so I usually alter the contrast and color some using curves in Photoshop. This photo is, I feel, I pretty good representation of what my photos typically undergo.
Before:
After:
While there's obvious color enhancement going on there, the final product is, to my eyes, closer to what I actually saw when taking the picture. With no in-camera saturation boost my camera usually produces images with fairly dull colors. But that's the way I prefer it since I'd rather decide what to do with the image later. Also, I've recently started using film again and I prefer to leave those images untouched once they're scanned onto my computer, besides straightening crooked images (which is most of them!) I've experimented with some of my film images in Photoshop, and except for one or two the others all simply looked better to me untouched.
Before & After - A creative method to add some truly wild results to some of your favorite photographs
Too many of my images are filled with 'white' - Which is the 'presence' of all colors (RGB.)
It is difficult at times to be creative in such a limited enviroment; But here is a simple process that just adds so much color(s) in such a simple manner.
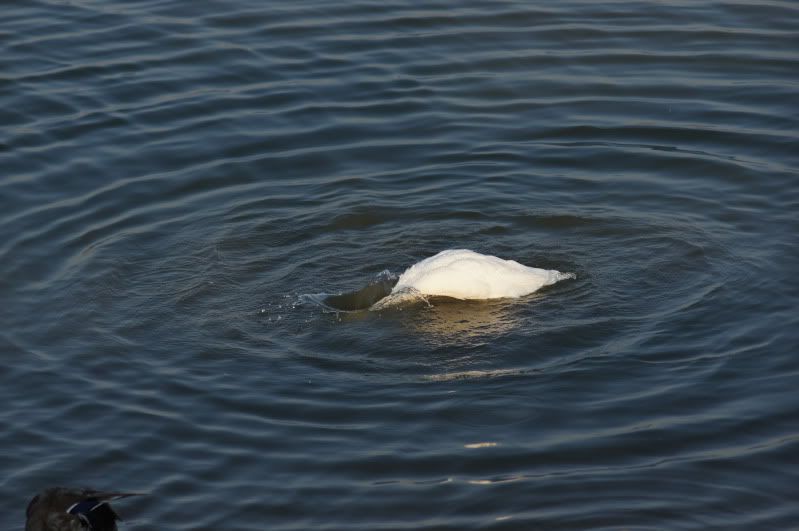
Here is the normal scene - miles out on the ocean ice. Waiting for animals to migrate through the open lead.
Open any photograph in Photoshop - Painter - Paint shop pro - Gimp any of them work in the same manner using different algorithms.
Next step is to just open the Curve Editor. This is very simple and easy to accomplish. Just click 4 , 5 or six times on that diagonal line. Spacing isn't important as you will soon see. You can easily add more points later to achieve more colors.
I am going to keep this as simple as possible; then you can explore using other layers with other controls in back of these results to tweak the image in ways you never thought of.
Click, click, click , click that's all -
Now begin to move these points. Some of them up and others down
You will see profound differences occur as you move these points. You can actually make some of the colors 'fit' to make the scene dramatic.
Here are a couple before/after pictures to demonstrate a few interesting things that seem to be controversial among some people posting to this forum!
The idea that a good photographer should be able to create a production image straight out of the camera is true; but 1) not necessarily of any given subject/scene and 2) not necessarily as a standard practice. The first is true because there are some situations where that simply won't work, and to get the shot requires post processing. The second is because there are many valid reasons for using methods that virtually never produce a finished product directly from the camera.
In addition to the issues about post processing, there are folks who would also suggest that a good photographer doesn't need fancy/expensive cameras, and for example can use a fairly simple camera to get good images. It's true that a good photographer can get good images of something, even with a simple camera; but to get a good image of specific subjects (not just a random "something", but what the current job specifies) does require a camera that is far more capable than average.
One example is in harsh low intensity light, where high ISO is required and the result is necessarily less dynamic range and higher noise. I ran into just such a situation this afternoon, where the Light Level measured only 5 EV. I had been outside shooting in plenty of light just prior to this opportunity, and the only lens available was a 24-120mm f/4 that was currently mounted. Any P&S would have worked for the outdoor shots, but the opportunity that presented itself indoors would have been lost.
This shot was made at 1/100 and f/4 while Auto ISO set the ISO to 5000. There aren't many DSLR's that can handle those conditions, and virtually no simple camera would have been suitable. The Nikon D3S of course is absolutely the best camera currently on the market for this type of work, and that is why I have it.
The significant configuration feature for this discussion is that the in-camera JPEG processing was adjusted, not to provide a production JPEG, but rather to generate a very accurate histogram. This was the last shot I took, with about 10 of this subject and maybe 30 total in this low light. Exposure on this shot is dead on correct. With a high contrast scene and at 5000 ISO the camera does not have excess dynamic range, so if exposure is not dead on there would be blocking of either highlights or shadows.
The White Balance was set to 4700K with the Hue adjusted for green to be at +5 on a scale of +/- 6. That gave White Balance multipliers for Red and Blue of 1.1 (theoretically 1.0 would have been more correct). The contrast adjustment was set to "Low", as was sharpening.
Here is the JPEG produced by the camera, which easily is not exactly what anyone would want to use!
The raw sensor data was interpolated using UFRAW. White balance was set to 3487K, with RGB multipliers of 1.18, 1.34, and 1.70. Brightness was reduced slightly to get appropriate skin tones (note that that reduction also reduced noise, which is why maximum possible exposure was determine by ETTR using an histogram).
The gamma was reduced significantly, from the normal 2.2 to 4 (reducing contrast) and the linearity was changed to lighten up the lower values more than the higher values.
Which is to say, the processing of the RAW file was very different than what the camera's internal software had done (or is even capable of doing).
The resulting TIFF formatted file was only slightly edited. First the image was cropped to a 5:4 aspect ratio and then resized to 840 pixels wide. Output sharpening, first with Unsharp Mask and then with a High Pass filter was applied. Then a half dozen minor spotting touch ups were made.
Below is the result. I would suggest that there is no P&S camera available that would have gotten the shot at all, and only half a dozen or so DSLRs. None of them, including the D3S, are likely to be able to produce this image of that scene with any adjustment of the in camera JPEG configuration.
Here is an example where editing is essential and.. .. there are no subtle differences -
A customer approached me one day and said ... Can yu make this look like new? Sure I replied; that is simple - to prove my point, I handed this photograph over to a 50 year old woman who had never used a computer or done graphix in her life. I spoke 4 sentences to her. She followed the simple steps. It took her 8 hours to accomplish this 'miracle'. She had a lot of fun. Especially when her friends were surprised that she did it they were so pleased with the results.
Four simple sentences -
Zoom in as far as you can with the magnifying tool
sample a 'shade' of grey with the eyedropper tool
Paint that area in to match the surrounding area
Zoom out to check your work.
Yes editing is essential to learn & master and there is nothing hard or difficult to understand.
I like simple.. "Simple" is easy to understand and comprehend!!
Here's one I altered a little more than I normally prefer. In fact I hate to even say that I approve of doing this to my own image, though I do think the final outcome looks better:
In case you didn't notice, I replaced the moon with a different, scaled down image of the moon I took on a separate occasion, but one which was properly exposed. I also have the same picture with the same enhanced colors, but with the original moon.
Edit: I'm wondering if I could have gotten the same effect with a graduated neutral density filter. I have one, but it doesn't fit the lens I was using at the time. Also, the moon was super bright when I took that, so I'm no sure my filter would have been enough as it's not terribly dark.
The right way to do this is take two quick consecutive shots, one exposed for the scene, and one exposed for the moon. Then merge the two photos in post. Using a moon from a different scene is a no-no in my book, because it's not real. That moon isn't even in the same phase as the original, nor the same size. So it's not a historically accurate recording of the scene. However, a bracketed shot is historically accurate. And you're right, a GND wouldn't have reduced the exposure enough. You get an A for execution though as your composition looks pretty good.
Oh, and good job leaving your EXIF intact on your image.
Please register to post and access all features of our very popular forum. It is free and quick. Over $68,000 in prizes has already been given out to active posters on our forum. Additional giveaways are planned.
Detailed information about all U.S. cities, counties, and zip codes on our site: City-data.com.

 Please register to participate in our discussions with 2 million other members - it's free and quick! Some forums can only be seen by registered members. After you create your account, you'll be able to customize options and access all our 15,000 new posts/day with fewer ads.