Please register to participate in our discussions with 2 million other members - it's free and quick! Some forums can only be seen by registered members. After you create your account, you'll be able to customize options and access all our 15,000 new posts/day with fewer ads.
I've posted a few other things that have gone over well here, so I figured I'd continue. I've posted some about our Master Bedroom Makeover that is in progress and I also had a thread about our conversion of an old CRT TV nook into some stylish shelving. Today I'm posting about our Master Bedroom makeover.
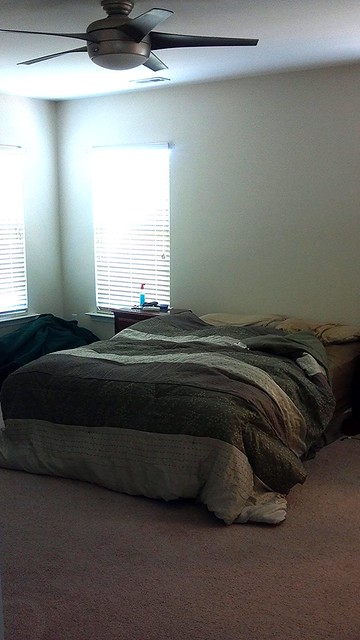
Here are two pictures from 3 years ago when we first moved in. Rather dorm-like as we had no real furniture and were not ready to commit to any until we had a design plan.
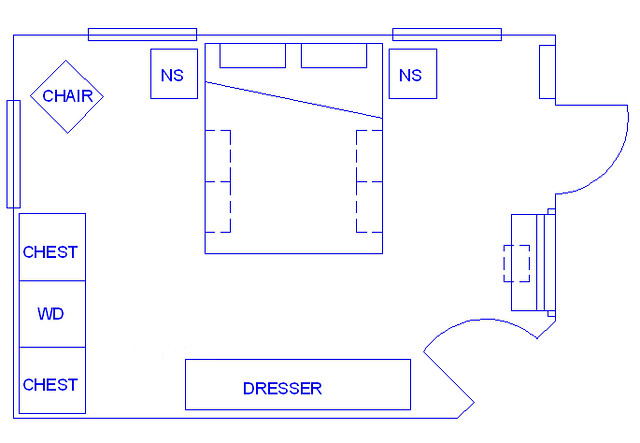
Unfortunately, we had lots of other rooms to work on (and we strictly budget our money) so it took awhile to get to this room. But, a few months back we started the planning finally. Here is the initial (generally to scale) layout that we came up with. The door on the bottom right is the room entrance and the other door is the entry to the Master Bath and closet area.
We also knew that we wanted to go with a very Scandinavian design in this room. Lots of whites and greys but then add in very bright, saturated colors and geometric objects to stand out. From there, we made our first two purchases: some funky bedding from a Norwegian design company and a second-hand score of a painted mid-century dresser:
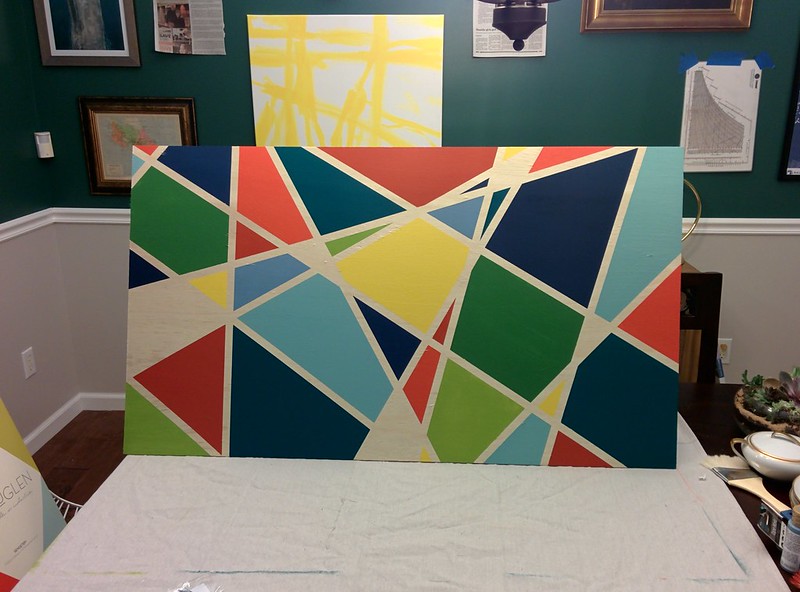
We also wanted a big piece of art over our bed but were coming up short finding something that really wow'd us, fit the budget, and also meshed with the design plan we had. Finally, we decided to DIY our own art piece. We used veneered plywood, craft paints, 1/2" painter's detailing tape and some patience to create this (don't mind the half-finished gallery wall in the background of our dining room):
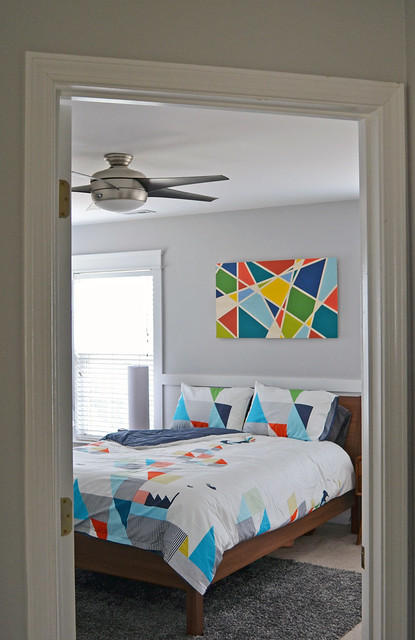
In addition to some of these purchases, we have done some major painting and trim work since those first two pictures posted in this thread. We added flat-board chair rail, some craftsman-inspired window trim, painted the wall below the chair rail white, and painted the room above the chair rail a very light and soothing grey. We are still working on the rest of the room per the layout we designed above, but here are two "in progress" pictures that still show off a ton of our progress so far:
Hopefully we will have more progress to show soon (while we also work on our bonus room, and kitchen, and dining room, and reading room...haha)
Very nicely done. I hope you enjoy your "new" master suite. The "before" pictures remind me of ours when we first moved in. And, the layout is very similar.
We've since repainted, put up new curtains, replaced the ceiling fan, and really made it our own, just like you have.
It's very satisfying when your living space truly becomes your own.
Great job by adding the trim around the windows and the wall, also the slight accents in the tones of paint..2 different colors (or may be just a shadow line) it looks like to me..Nice work!
The artwork fabulous!
Wow, thanks for all the love so far! Didn't imagine I'd get so many posts so quickly.
The art was very fun to make and honestly turned out even better than expected so I am really glad to see many of you had a positive reaction to it as well. I completely agree that DIY artwork can be a lot of fun and lets you customize colors exactly how you want. plus, it's truly one-of-a-kind
I know the colors are a bit funky and bright (and might not suit everyone's taste here) but the white and grey make the room quite soothing overall while still having the modern vibe we like. We are working on some extra dresser storage, installing a combo wall-shelf and wall-desk unit, and painting a large leaning floor mirror we bought. Hopefully more pictures in the not so distant future!
Very nicely done. I hope you enjoy your "new" master suite. The "before" pictures remind me of ours when we first moved in. And, the layout is very similar.
We've since repainted, put up new curtains, replaced the ceiling fan, and really made it our own, just like you have.
It's very satisfying when your living space truly becomes your own.
Completely agree! We have so much fun doing these projects. Never thought I'd enjoy it as much as I do until we bought our own home. Hope you keep enjoying your house as well
GOTTA ASK. Did the idea for the art work come from the bedding? If not, damn you are good and I think I need to hire you!!!! I have a piece of art that I love but it doesn't work where it did in my former home and I hung it in the guest bedroom and I am having an awful time trying to find bedding that I think fits the picture. If I didn't like it so much I would get rid of it.
You did a wonderful job pulling it together.
Please register to post and access all features of our very popular forum. It is free and quick. Over $68,000 in prizes has already been given out to active posters on our forum. Additional giveaways are planned.
Detailed information about all U.S. cities, counties, and zip codes on our site: City-data.com.

 Please register to participate in our discussions with 2 million other members - it's free and quick! Some forums can only be seen by registered members. After you create your account, you'll be able to customize options and access all our 15,000 new posts/day with fewer ads.